Few days to go now and I have just about finished fettling with the bike.
To the right of the page you should see a where are we? link. click it.. Now you may stalk us... we will try update our position everyday once we start off, it should save the last 7 days updates on the map.
Back to the main point of this post...In-case anyone out there is wondering how we have modified the bike below is a vague write up:
-->
Bike Mods
This is the bit I was supposed to type
up a month ago and kept putting it off as I was actually busy with
the things I will writing about below.
Once we decided we were doing this (
about 3 years ago ) the two-up fully loaded configuration
signifiantly narrowed down the bike search, as Charli didn't have an
interest in motorbike riding/operating at the time. It was either a
big BMW GS, a KTM 990, an Africa Twin or a Capanord Rally Raid. Out
of the lot, reliability per £ meant that the Africa Twin won hands
down. So I managed to get a low milage stock example (Cat D write
off) for quite a decent price. Although looking back I probably
should have got something with all the extras already installed
rather than a clean stock bike... nevermind. The mods gave me the
opportunity to get to know the bike mechanically pretty well.
Suspension
First and foremost the suspension
needed sorting, so after a recommendation by another fellow Africa
Twin rider I looked in to the Ricor intiminator valves for the front
and also their rear shock. Then sprung and valved this for my weight
(65-70kg + luggage) so around 90kg. A month ago I got the spring
changed to a stiffer one to accommodate for the weight 2 up + 2
peoples luggage for a long trip, so around 180kg max.
Frame Strengthening
With the increased weight the flex in
the rear subframe also needed to be reduced. So we got help from
Ernie at Overland Solutions to do some extra triangulations at the
back, did this pretty soon after purchasing the bike.
Cables
The Africa Twin suffers with sticky
chokes caused by the way the cable is routed. So I changed all the
cables (including throttle and clutch) using Venhill cables (I sent
them my cables and they made me new ones). The clutch cable has a
plastic inner sleeve so technically doesn't need lubricating.
Seat
Another important aspect was the long
distance comfort and the reach of my short legs. So I got the seat
cut down at Caulfield Leather in Hyde. Matt was helpful and cut the
seat down as much as it was feasable and added two gel pads (one for
the passanger and one for the rider). The bum cramps don't kick in
until about 200 miles now.
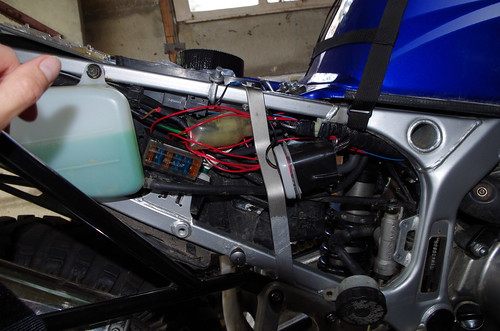
Electrics and Dash
One of the other known problems with
the Africa Twin bikes after the sticky choke is the dodgy rectifier
and its corresponding connector, so I got a new Shindegen FH020
rectifier from ebay (a common modification amongst other owners) and
installed this. In addition, the Africa Twin has something inherently
weird with the location of its 30A main fuse... it sits in the same
assembly as the starter motor relay. So I seperated this out and now
the main fuse is standalone.
The Africa Twin is an old bike these
days and it has a rather large trip computer (very useful) and a
basic dash where there is a lot of wasted space for extra switches
and outputs. So I got an aluminium plate dash from ebay (Coyotetrips)
for December (the bike) that fits straight over the stock dash.
In terms of electrics I have added
2 x 12V auxilary outputs (1 to run the
tyre compressor from and the other to add a USB converter for very
slow battery charging :) (Andy's favourite topic) )
A fan over-ride switch
Koso engine water temprature sensor and
gauge
Heated grips and its corresponding
switch
And finally a main switch that controls
a relay to enable/disable all of the above features (except fan
over-ride) once the ignition is on. I took the 12V switched live from
the horn live feed on the right handle-bar (I think it was the horn
anyway).
For these extras, an additional fuse
box was used and an 8 pole terminal from Vehicle wiring products to
create enough live and ground connections. I used cheap and cheerful
spade terminals due to their easy availability everywhere.
Centre Stand for Maintenance
I also invested in a centre stand as it
is useful when taking the wheels off the bike. Unfortunately the
exhaust had to come off to get the centre stand in, had to have help
from a garage for the springs at a later date as they were impossible
without locking grips and bigman strength, which I had neither. The
exhaust was installed with new gaskets and help from Charli, who was
holding the silencer and ecouraging me to bash harder (hur hur).
There was lots of bashing with my bare hands and a little bit with a
mallet, but eventually we managed to sort it.
Clean, Paint and ACF50
Whilst doing the electrical work I
stripped the bike down quite a bit , cleaned it and got most of the
rust off with a wire brush from the bits of the frame that had
started to corrode. Then I painted those areas with Hammerite
straight to rust paint, which worked a treat. Then I sprayed
everything with ACF50. Look it up it's good stuff.
Suspension Linkage Strip
While the shock absorver was out I
removed the rear suspension linkage and painted the rusty areas,
cleaned the needle roller bearings with parafin, then washed it off
with brake cleaner and re-greased it all and added new seals.
Brakes
The Africa Twin brake pistons are known
to corrode and stick, so I replaced the pistons (front and back) with
stainless steel ones from Wemoto (end of sticky brakes). Whilst the
brake fluid was out of the system I replaced the 12 year old rubber
brake hoses with Melvin braided hoses.
Other Maintenance
Ran Wurth radiator flush in the cooling
system and drained the old coolant out and added new stuff.
New engine oil and filter.
Pipercross airfilter (washable /
cleanable)
Then I did the valve clearances, had to adjust them a tad as they were all a bit tight. This took a few iterations over few days to get right. But was worth doing.
December also has a wonderful Motad
Venom exhaust, and with the Pipercross filter the engine might run a
bit lean but there really is no time for a dyno run. I will keep an
eye on the colour of the sparkplugs and if necessary go up a jet
size. Will not be changing the sparkplugs until Turkey as they have
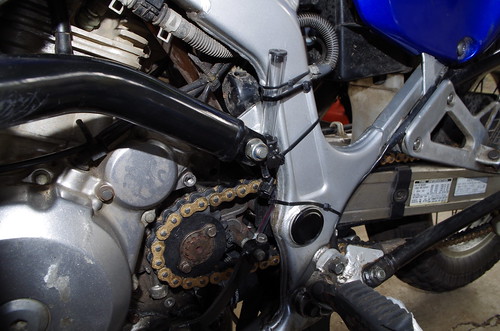
not done many miles since I put them in. Also added a Tuturo chain
oiler, however I used an additional tap to turn it fully off as I
can't be bothered to remember the flow level setting each time. (look
up how it works if you don't get what I mean)
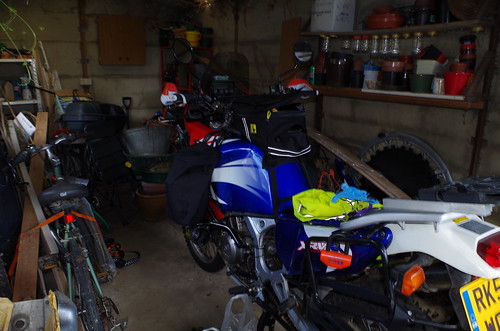
Luggage and Tools
For the luggage we went with Steel Pony
canvas luggage (from Australia) to save weight and avoid crushing
Charli's legs every time we have a low speed tumble (which we will
have about 8000 of at least). We also decided to keep the topbox
until it falls off (it will fall off) as it is the only secure
locking box we have. We are going to protect the Steel ponies with
steel cable locks, although this will only be a deterrant and not
stop someone with a knife from cutting them open and emptying the
contents. So the topbox has important stuff like the tent (Northface
Rock 22), airmats (Exped Synmat Ultralight), First aid kit (see
previous post regarding this), other medications, maps and
electronics etc.
We are also going to be using a Wolfman
Explorer Lite tank bag and a couple of Bergen side pouches slung over
the petrol tank.
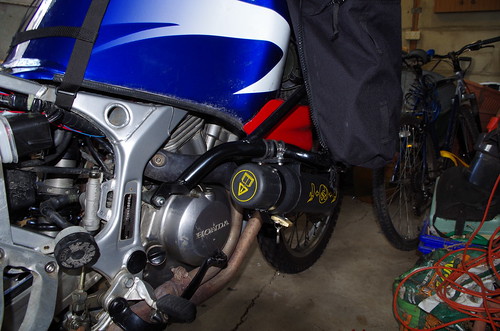
The tools and spares are going to be
carried under the seat and in Tool tubes attached to the crashbars
using P-clips. Trying my best to distribute some of the weight to the
front.
I also got the sidestand extended by Vern at Project VND in Cheshire (also if you like making your own bread, his workshop is near Walk Mill... they have some very nice flours). Vern is a brilliant guy with good stories giving a lot of attention to detail to his work. He also helped me mount the engine crashbars properly (cut and weld job at the mounting tabs) which I purchased off Rugged Roads. The original fitting was putting unnecessary stress on to the front part of the bike frame and could have damaged it badly in an accident). Africa twins sometimes suffer with off the shelf stuff not fitting as there can be slight variations one frame to the other).
I also got the sidestand extended by Vern at Project VND in Cheshire (also if you like making your own bread, his workshop is near Walk Mill... they have some very nice flours). Vern is a brilliant guy with good stories giving a lot of attention to detail to his work. He also helped me mount the engine crashbars properly (cut and weld job at the mounting tabs) which I purchased off Rugged Roads. The original fitting was putting unnecessary stress on to the front part of the bike frame and could have damaged it badly in an accident). Africa twins sometimes suffer with off the shelf stuff not fitting as there can be slight variations one frame to the other).
I think this covers most of the mods on
the bike. The suspension is not perfect but it is better than setting
off with the stock set-up
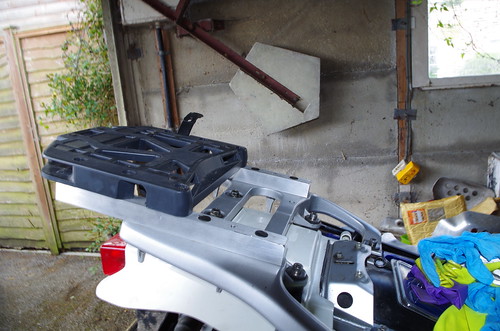
I would like to thank Paul and Danny
very much from the uni workshop, for helping me sort a few key bits
of the bike such as a way to lock the toolboxes and adapter plates to
move the rear rack back so the topbox didn't take up half the
passanger space.
Few pics:
Chain Oiler
Bergen Side pouches and Wolfman Explorer Lite tank bag (very nice fit for the Af-Twin)
Tooltube
Extended Rear Rack to create more space for Charli
Additional fuse box for the dash gizmos and Asda Tupperware covered in Duct-tape
Anyway, will do a more up-to date post soon.
Oli (Kaan)
....Vehicle wiring products... brings back memories haha.
ReplyDeleteOne more thing, where are the wiring diagrams for the mods? Just not enough detail :D
lol their in my head floyd.. + there's not enough wires to form a diagram with lol :D
ReplyDeleteJust to let you know we're reading and keeping up with your travels.
ReplyDelete~ Natalie & Co
D7 Mechanical Workshop